|
ForeCyt Reference Guide (Version 8.1)
|
Calculate Wells

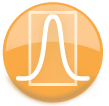
Click Calculate Wells to initiate Well ID. The following screenshot is an example of what a plate looks like after a region of interest has been gated. By default, only the Well ID view is zoomed out and the last well of the row or column is displayed in gray. If you designated shakes or rinses in Protocol to happen at the end of the row or column, it will be easier to do a visual check to determine if the well ID is correct.
Clicking on the Well Finder screen and dragging across a population—as shown in the following GIF. the A wells—zooms the view in on those wells. When the view is zoomed in, all the wells will automatically display. To force the wells to be displayed toggle Enable/Disable Well Display and New Well Width. More information about moving the Well Finder can be found in Zoom/Pan Wells and Navigate Data.
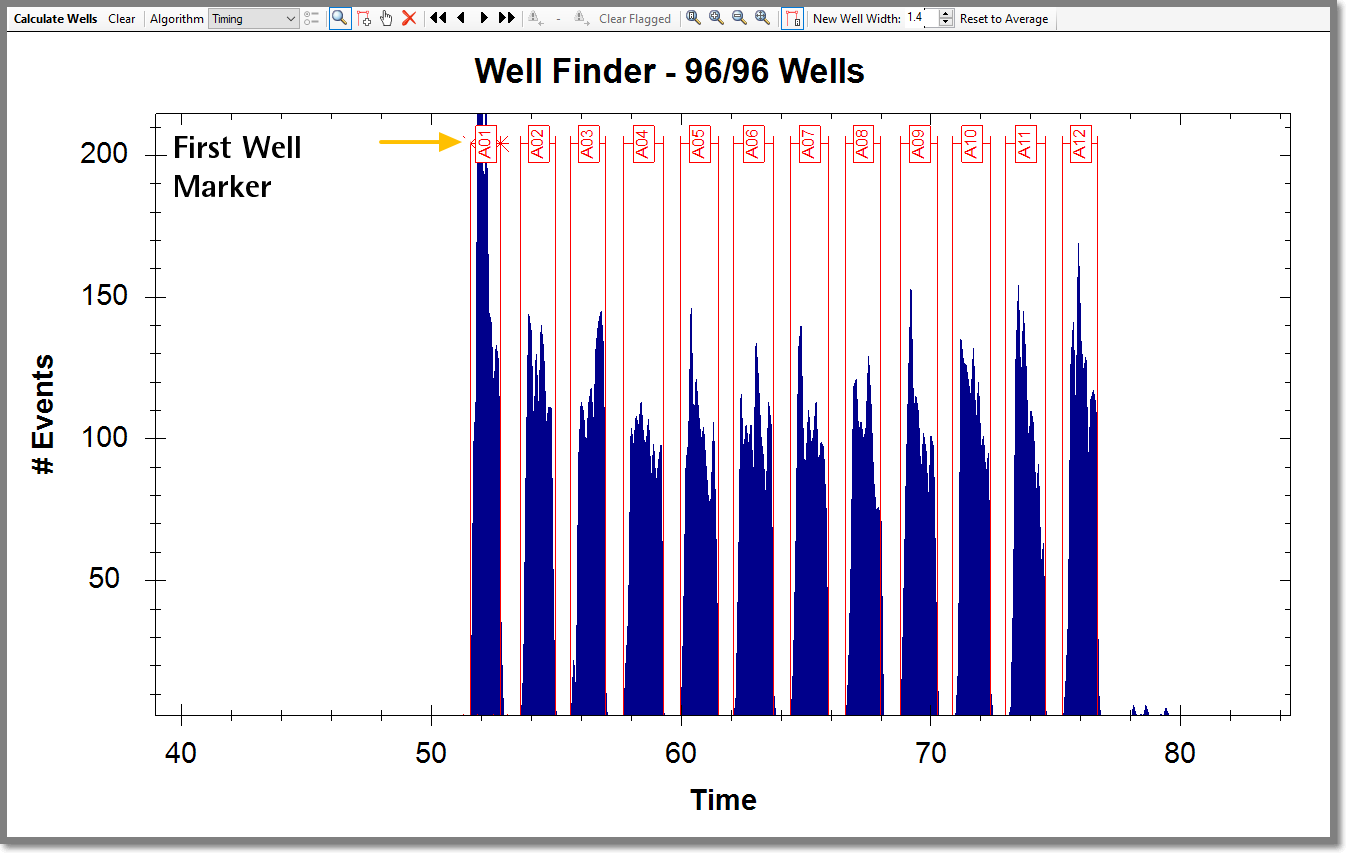
The following screenshot shows there are now clearly defined wells with flags identifying the well number. When ForeCyt begins calculating wells for Well ID it looks for well A01 to begin. The “whiskers” at the top and the bottom of A01 mark the first well ForeCyt identified. This well has special functionality. When it is moved ForeCyt will try and calculate all the other wells based on the first well being in that specific location.